Learn How to Create Completely SEO Optimized Designs & Upload them to Etsy IN MINUTES!
Introduction
If you’re a Print on Demand / Etsy seller like me, you probably know how much time it takes from creating a design to uploading a fully finished, SEO optimized product that sells, right?
You need to:
- Do research
- Create the design
- Create a SEO-optimized title
- Create SEO-optimized tags
- Create a SEO-optimized description
- Create mock-ups
- Create mock-up videos
- Create a size chart
- Select a production partner
- Finally: upload the design.
I would say… if you’re SKILLED and if you have the right tools, this would take around 15–20 minutes for a design. IF you already have a design idea.
But what if I told you there’s a way to create, prepare & upload more than 50, possibly even more than 100 designs, in these 15 minutes time?
You probably already know the product, because I’ve written about it in the past.
Yes. Mydesigns.io
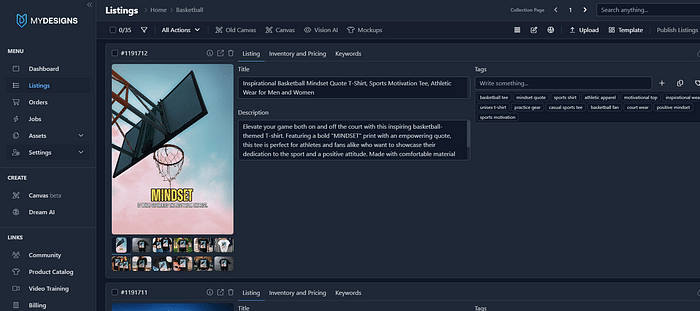
In the screenshot above, I’ve published 35 designs all at once to Etsy.com. But in the tutorial below, I’ll just do 4 at the same time — for demo purposes.
P.S. Before you start — in case you don’t have an Etsy shop yet — you can open one by using this link. You’ll get 40 free listings (save $0.20 PER listing, because you need to pay in order to publish stuff on Etsy).
Step 1: Generate Designs
You can either create designs with your preferred design tool, OR you can have them generated for you by AI.
For this, you can use MyDesign’s Dream AI tool.
Note, for this feature, you’ll need to PRO version of MyDesigns. You can already get started for free, but trust me — it’s definitely worth it to get the pro version (if it wasn’t, I wouldn’t be writing this).
And a small tip: If you get it yearly, it’s cheaper. PLUS they also regularly have a 25% discount, so in the end you’ll pay like $190 for the year — which is PEANUTS for everything you get in return.
If you’re not convinced yet, just read on.
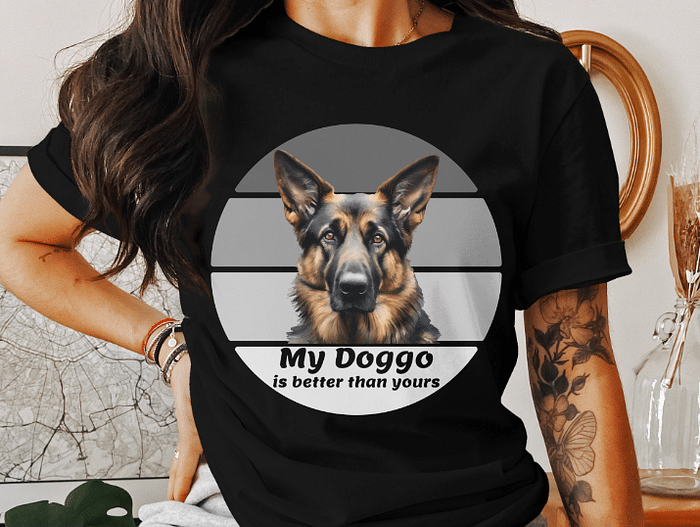
Anyway, for example, I’ve typed “Portrait of German Shepherd dog, high quality, no background (transparent).”
The result:
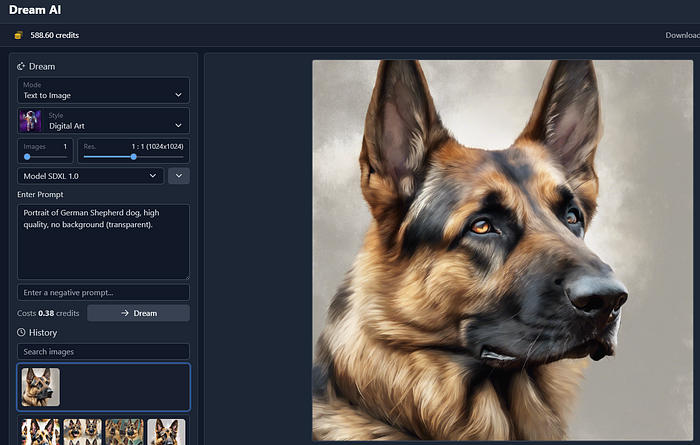
Looks alright, but I’m not completely satisfied. I want the whole head of the dog to be nicely visible.
Let’s update the prompt (yes yes I know, I’m not the best in prompt engineering):
Portrait of German Shepherd dog, high quality, no background (transparent). Make the dog look straight to the camera (so no side angle). Also the whole image of the dog’s head should be visible.
Oh and I’ve also changed the “images slider” to 4. Result:
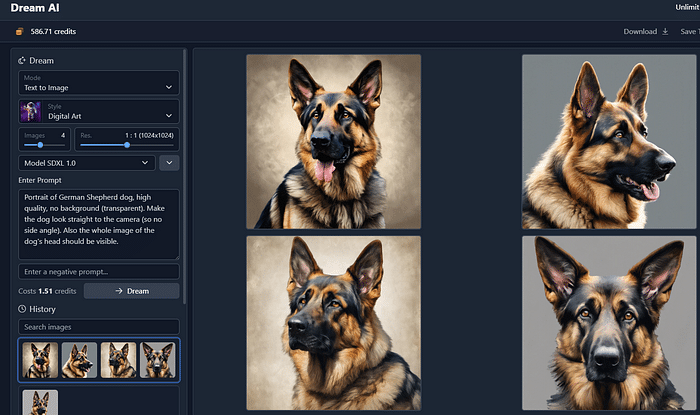
Alright, I can live with this.
Next I select the 4 designs and add them to my listings:

Let’s go edit them now.
Step 2: MyDesigns Background remover
I’ve added those 4 designs to my listings.
Now comes another awesome part: I can edit them IN BULK!
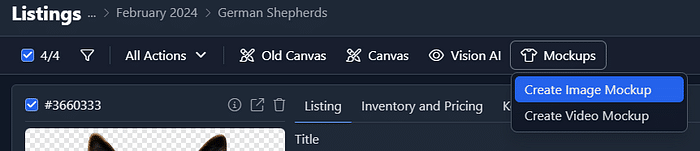
On top left, I’ve select all 4 listings. Next I simply go to “All actions”
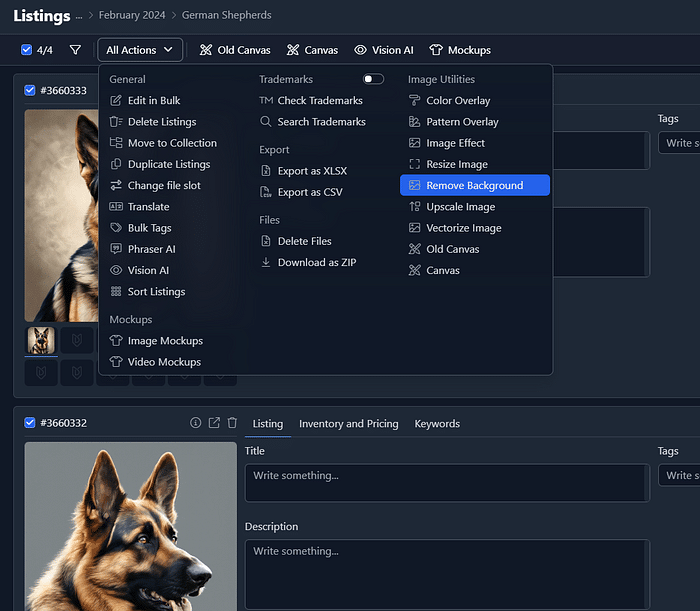
Select “Remove Background”.
Note that you’ll also need the pro version for this (cuz you need credits).
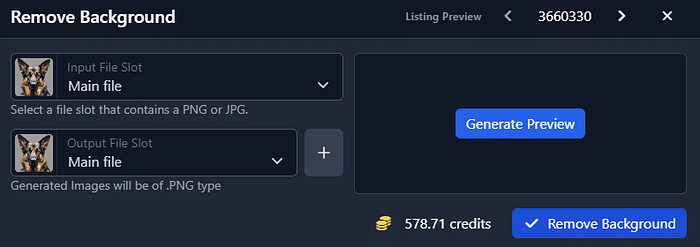

The result:
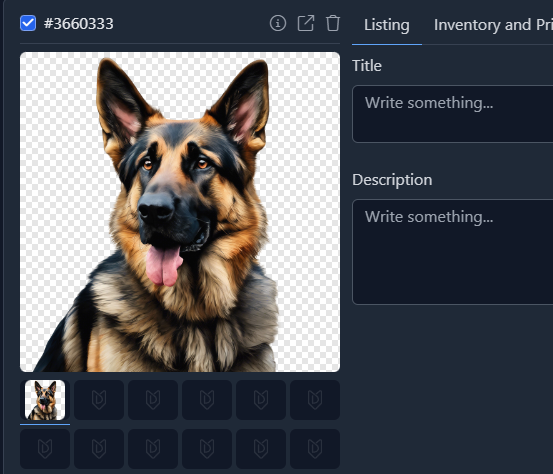
Perfect. Now, the next step is to fill in all the data.
For this, we can another insanely cool tool from MyDesigns.
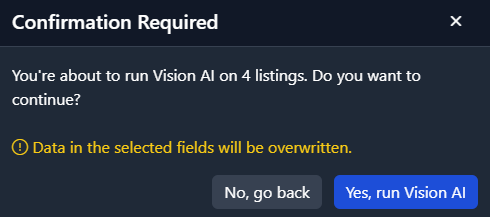
Step 3: Generate SEO with Vision AI
Vision AI is basically an image recognition tool. It scans your images, and it AUTOMATICALLY generates titles, descriptions and tags based on your image — all which are SEO optimized for Etsy!
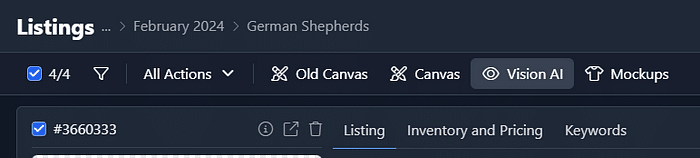
So, I select my 4 designs, and then click on “Vision AI”.
The following screen pops up:
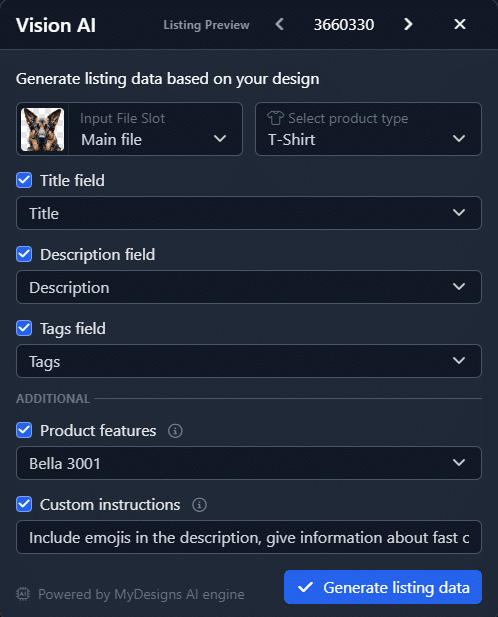
I’ve added 2 fields at the bottom:
- Product features: I’ve selected Bella 3001 (which is a T-shirt brand), because this is the best t-shirt to sell at the moment
- And I’ve added custom instructions, just to get that little “extra” personal touch in my listing. I’ve typed: “Include emojis in the description, give information about fast order fulfilment within 1–3 days”
Next, click on “Generate listing data”.
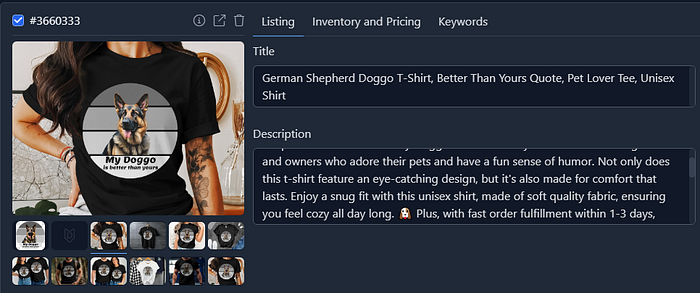
A few seconds later, this is the result:

HOW AWESOME IS THAT?!
Just look at this! Title is so good! Description is awesome! Tags are perfect!
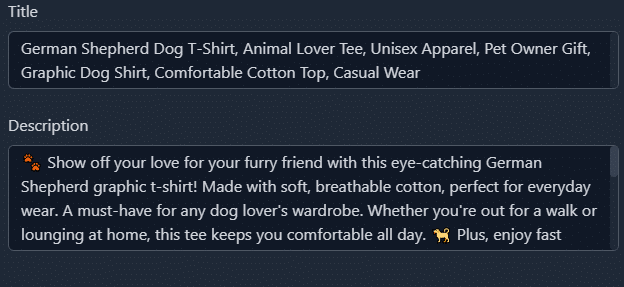
Sorry guys, I’m a bit enthusiastic here, but I absolutely LOVE this! You can’t imagine how much time I wasted in the past to come up with good titles, descriptions and tags.
Sure, I could ask ChatGPT for help… but that all still was manual work — and one-by-one!
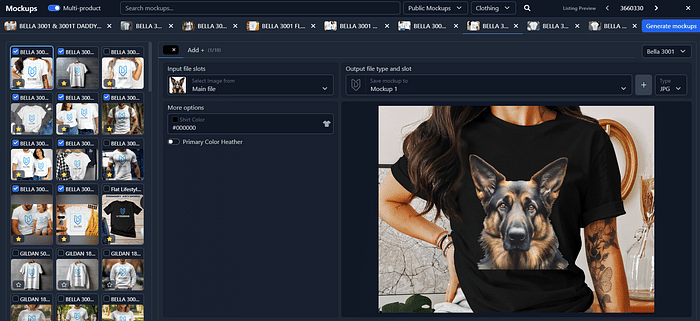
Step 4: Mock-up generator
The next step is to generate mock-ups.
And yes, you can already guess it: IN BULK!
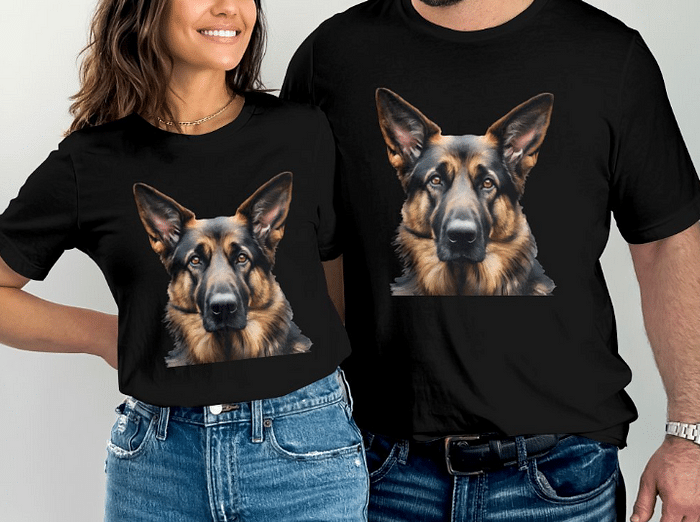
MyDesigns has hundreds of different mock-ups that all look amazing:
Another one:
You know what?
While seeing this, I feel like I should add some text to the designs first, before creating the mock-ups, no?
So let’s quickly do that first!
Step 5: Add some text
You’ve guessed it, myDesigns ALSO has a tool to bulk add text to ALL my designs! Epic right?
Click “Canvas”.

Next, on top right, click “Add listing file”, and select “Add to all”.
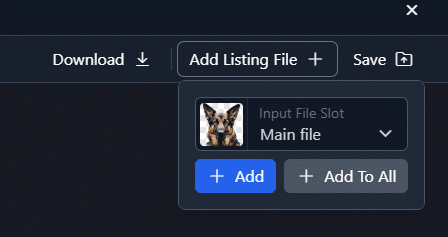
There we go:

Now comes the cool part:
You can add text, change the size of the image, add some background, and then SYNC it to all the other images (by right clicking, and pressing “Sync”).

There we go. I’ve now saved it, and the “primary designs” have changed.
I’ll have to run Vision AI again, but that’s just the click of a button as you know!
Let’s go back and finish our mock-ups:
P.S. I added the grey circle in the background because otherwise my black text wouldn’t be visible.
Step 6: Mock-up video
You’ve read it right! MyDesigns can even create video’s.
Well basically they’re just slideshows, but either way — it hugely improves your SEO on Etsy!

I won’t talk about this step too long — it’s basically just selecting the mockups you want to be added to your video and then simply clicking “Generate”.
Step 7: Publish listings
When everything is done, we can publish our listings to Etsy:
First we double check our data. If you’ve done everything from the previous steps, then this should all be alright.
Next you select your product — search for the Bella Canvas 3001.
The next part is “selecting your production partner”. I choose here MyDesigns, because they’re actually the cheapest, just check the screenshot below:

And YES! MyDesigns can PRINT, SHIP & FULFIL your orders!!!
I told you they could do anything!
As orders come in, MyDesigns takes care of the printing and shipping processes, which leaves you with more time to focus on growing your business (and uploading more designs)!
In the next screen, you select your mockups that you want to be pushed to your Etsy shop.
Also you can generate a size chart! Look how beautiful it is:

Step 8: Pricing
Here I want to quickly make a few notes:
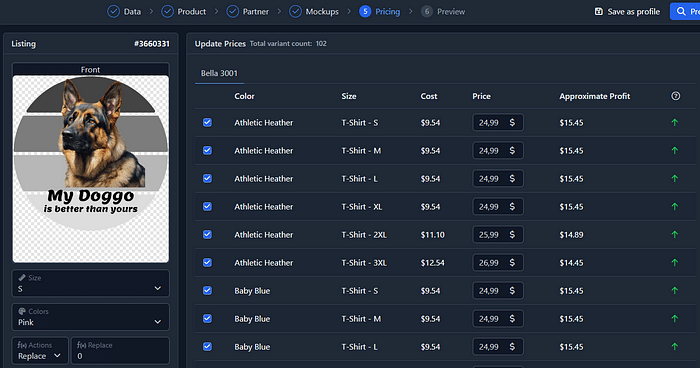
At the bottom left of my screenshot, I can enter a price. This will become the price for all my listings, and all variations.
But it’s important to note that 2XL and 3XL cost more to produce, so you should increase their prices with 1 and 2 dollars.
Also, you can see that I’ve chosen a price of $24.99.
This has a few reasons:
- I’m running Etsy discounts, which brings the price to around 19.99
- I use a “loss leader”, which means that for example I will price the “pink small” at a price of $18.95. So, in the Etsy homepage my listing will show up at $18.95.
- If I decide to run Etsy ads, I need to calculate in these costs
- Plus, if people really like your design, they’ll get it. Regardless of the “higher price”.
Finally, I’ve added a Prefix “T-Shirt — ” before the Size — just to make it more clear for the customer that they’re buying a T-shirt.
This prefix is especially necessary when you sell multiple products in 1 listing (YES, it’s possible, and actually recommended)!
Give everything a final review, and then PUBLISH your design to Etsy:

Step 9: Publish on Etsy
I can now hop over to Etsy, go to my drafts, select all 4 and hit “Publish”.
FYI in case you don’t have an Etsy shop yet — you can open one by using this link. You’ll get 40 free listings (save $0.20 PER listing, because you need to pay in order to publish stuff on Etsy).

And that’s it.
It took me about 20–30 minutes to do all this (and write this tutorial at the same time). Pretty quick, no?
Let’s summarize
MyDesigns is truly awesome.
It’s an all-in-one tool which allows you to:
- Generate Product Mockups in Bulk
- Publish in Bulk: Save time and increase sales by publishing anywhere from 48 to 120 Print on Demand and Digital Products with a single click.
- Multi-Product Publishing: Boost your sales and reach by listing multiple products under the same listing.
- Harness the Power of AI: Dream AI for top-notch graphics and Vision AI for catchy product titles and tags.
- Automate your Orders: Save time with completely automated order fulfillment.
- Vast Product Range: Over 50 Print on Demand products to choose from to fuel your imagination.
- Etsy & Shopify Integration: Sell your designs as products in bulk on these popular platforms with ease.
- And so much more…
I highly recommend trying it. You can sign up for a free trial here.
Have questions? Reply to this post and I’ll get back to you as soon as I can.
Thanks for reading!
If you’ve got questions or thoughts, drop them in the comments and I’ll get back to you! Follow or ???? if you’d like to see more content like this. Or buy me a coffee, this stuff is magical 😉
P.S. did you claim your copy of my free e-book yet?